About
In this article, we will set up an environment to program STM32 microcontrollers in C using VSCode . We will integrate STMicroelectronics’ tools to easily generate the base code needed for firmware development.
Prerequisites
- The VSCode editor
- An account on the STMicroelectronics website
- STM32CubeMX
- STM32CubeCLT
- ST-MCU-FINDER-PC
Installation
Note : Do not rush through the installation! Most issues arise from incorrect or mismatched installation paths for the various tools.
STM32 Tools
First, install ST’s proprietary tools to interact easily with the microcontroller:
- STM32CubeMX and ST-MCU-FINDER-PC install via graphical installers. Take note of the installation paths (commonly
~/STM32CubeMXand~/ST-MCU-FINDER-PC). - STM32CubeCLT installs via a script that, by default, creates
/opt/ST/STM32CubeCLT.
VSCode
After installing VSCode, configure the tools:
- Open the Extensions panel.
- Install STM32 VS Code Extension .
 STM32 Extension Installation
 Once installed, configure the extension to point to the correct STM32 tool paths:
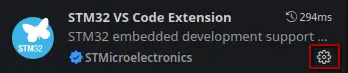
- Back in Extensions , click the gear icon next to STM32 VS Code Extension and open the settings.
- Specify the paths to the executables and the
STM32CubeCLTfolder.
 STM32 Extension Settings
 Now we can create our first project to confirm everything is working correctly.
Hello World
We will send a message over UART from the STM32 and blink the onboard LED.
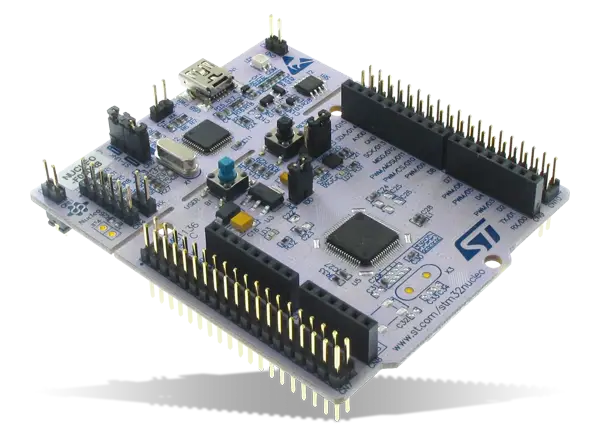
This tutorial is based on the STM32F411RE . Pin assignments may differ on other boards.
Generating the Base Code with STM32CubeMX
STM32CubeMX is ST’s proprietary software that lets you visually configure the microcontroller (GPIO, SPI, UART, I2C, DMA, etc.) and automatically generate the code.
-
In VSCode, open the STM32 VS Code Extension panel.
 STM32 VS Code Extension Panel
 -
Launch STM32CubeMX using the dedicated button.
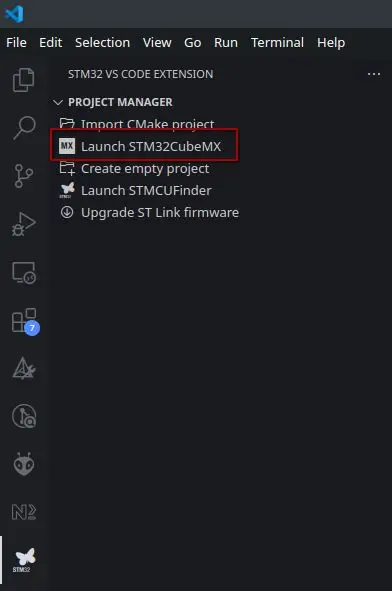 Launching STM32CubeMX
 -
Create a new project.
 New Project Creation
 -
Select your board or microcontroller.
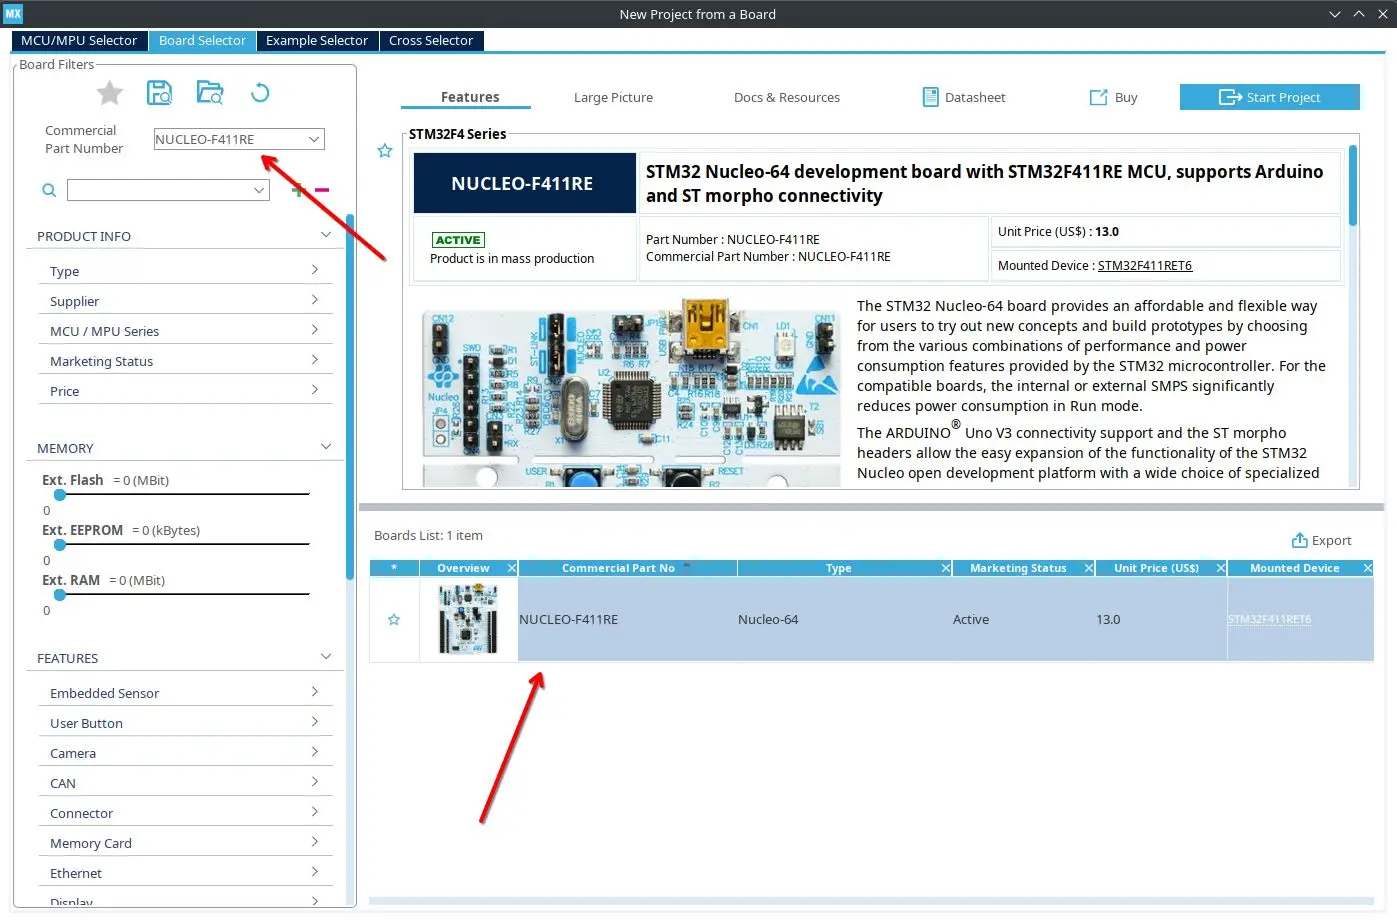 Board Selection
 -
Ensure the LED (GPIO) is configured, and note the “User Label.”
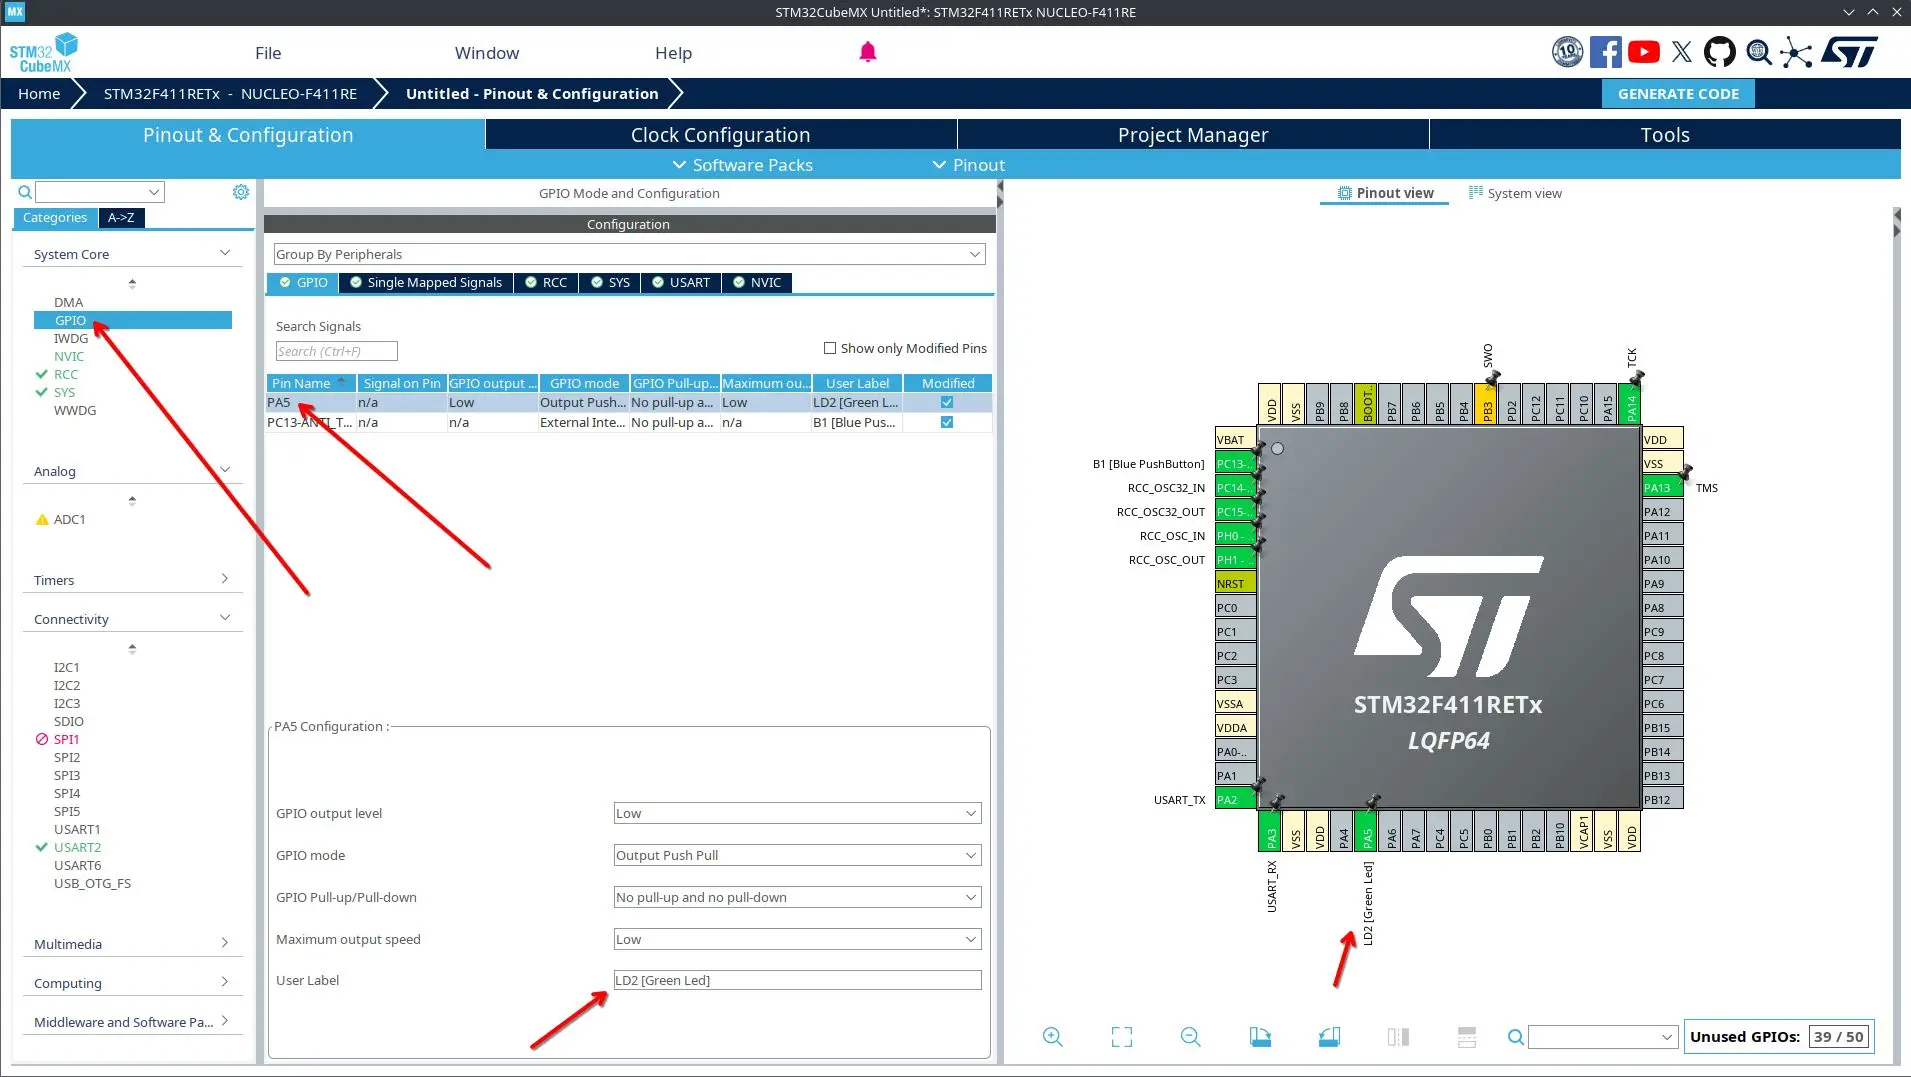 LED Configuration
 -
Verify that UART is enabled and set to 115200 Baud .
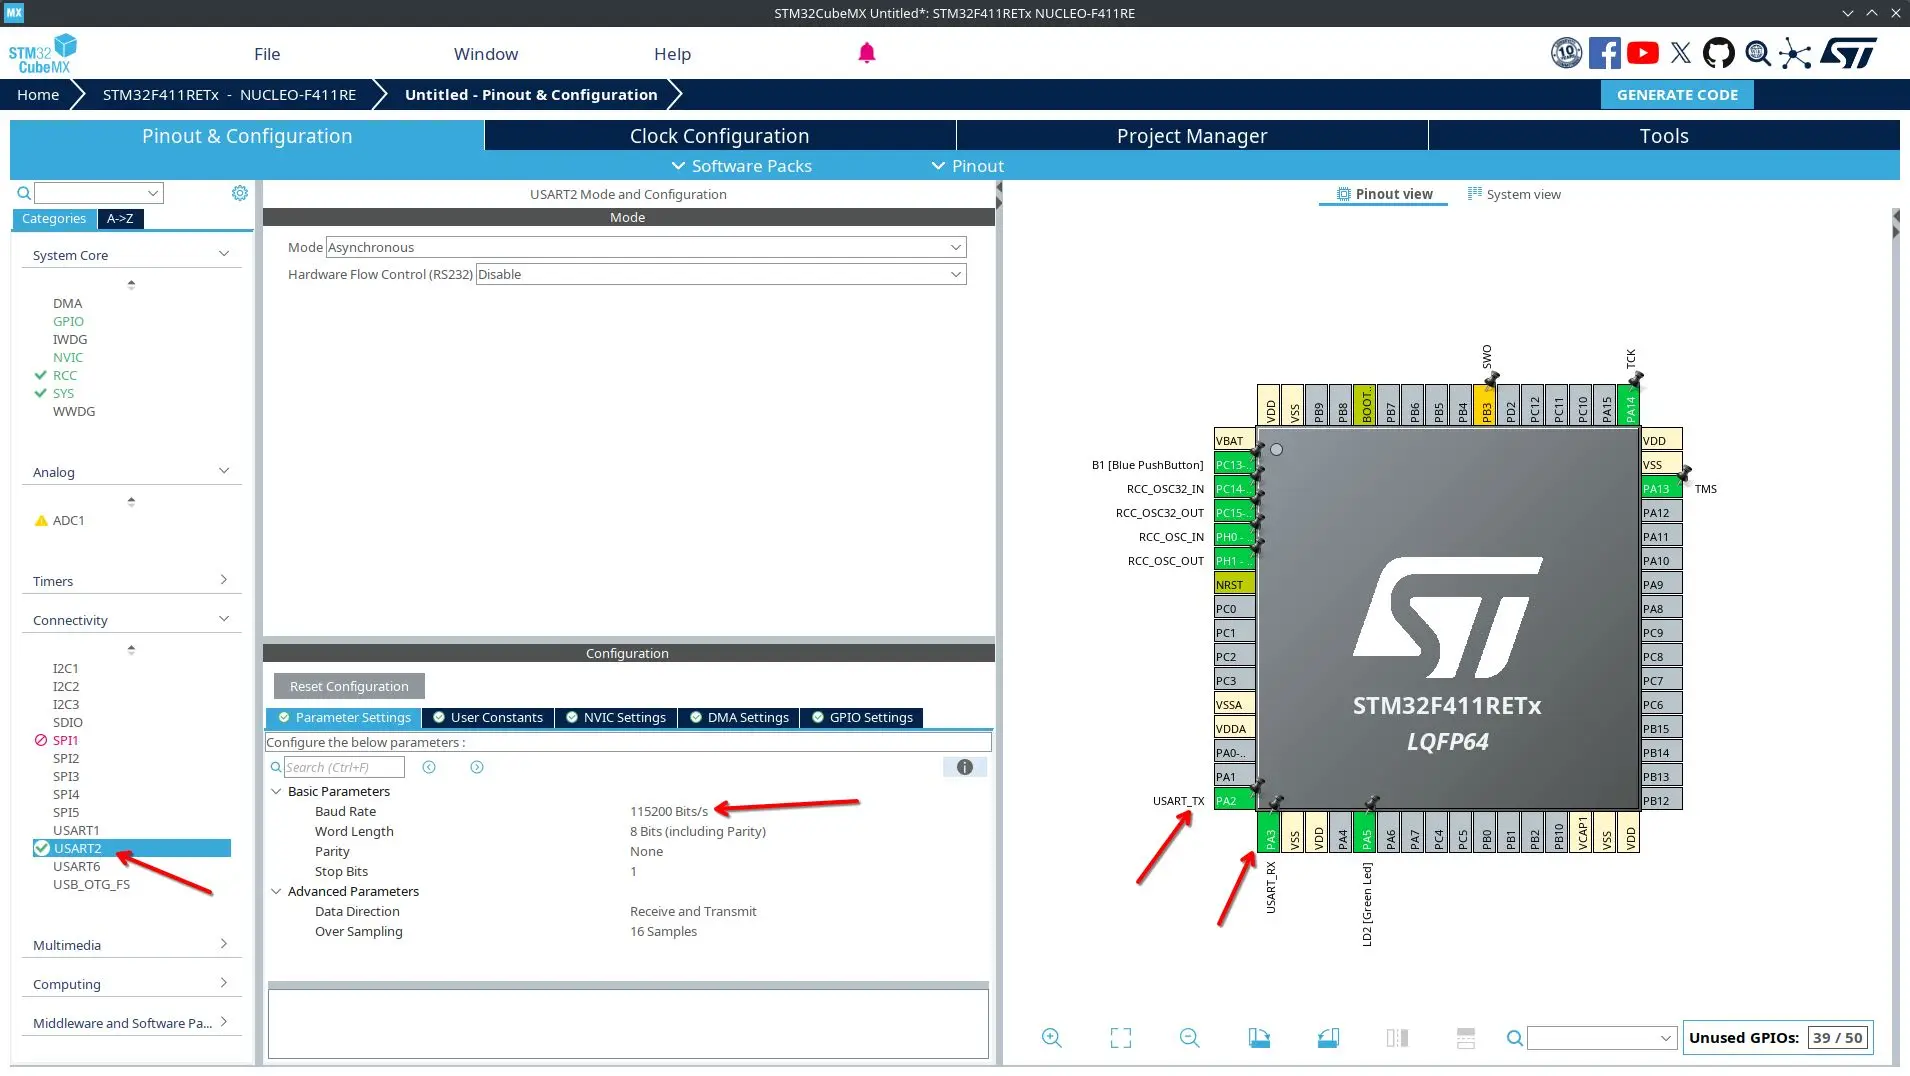 UART Configuration
-
-
In the Project Manager tab, name your project and generate the code.
Important : Select CMake as your toolchain!
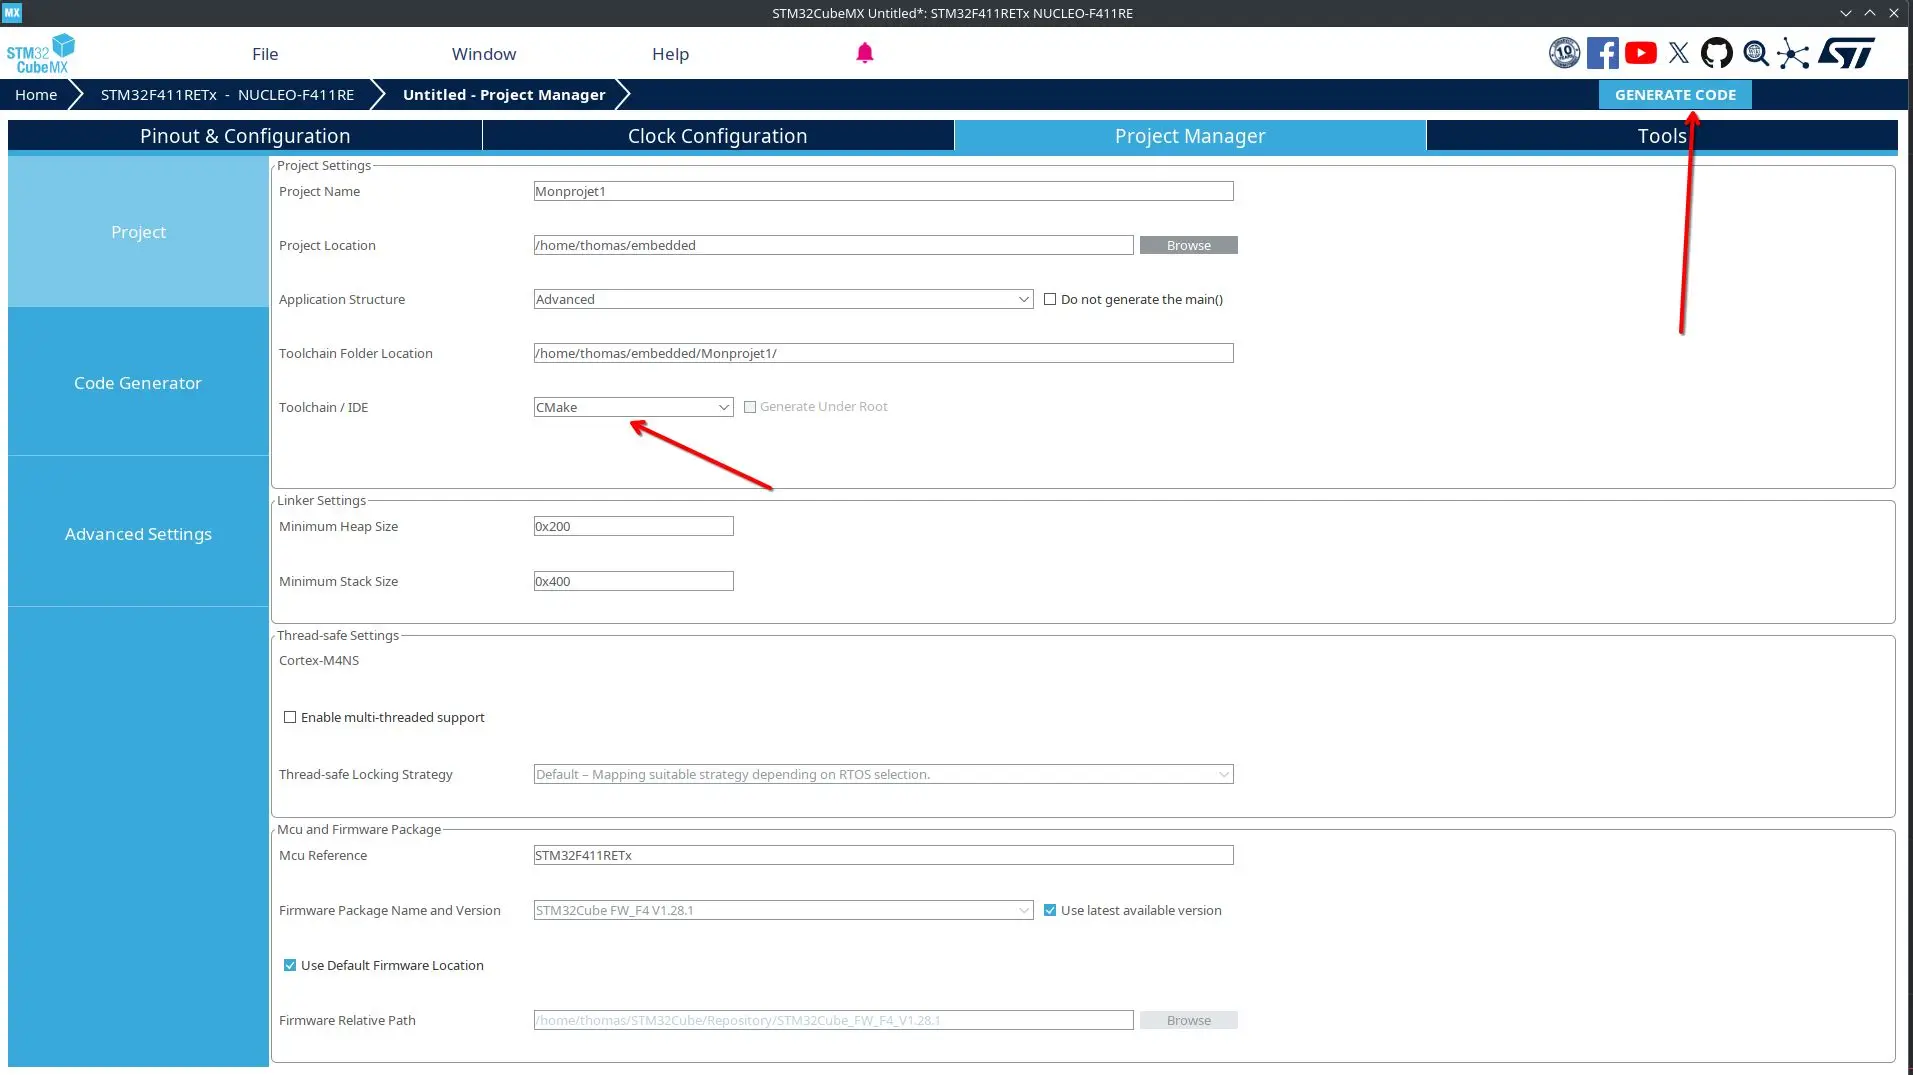 Project Manager - Code Generation
 -
Return to VSCode and import the CMake project .
 CMake Project Import
 -
Restart VSCode if needed and pick the Debug configuration when prompted.
Your IDE is now ready! Let’s write our first firmware.
First Firmware
We will blink the onboard LED and send a message over UART that includes a variable.
Find the full code in this GitHub repository .
Note : Place your code between the USER CODE BEGIN and USER CODE END comments to avoid overwriting when regenerating code with STM32CubeMX.
Two main sections need modification:
1. In main.c (Includes section)
/* Private includes ----------------------------------------------------------*/

/* USER CODE BEGIN Includes */

#include <stdio.h>
#include <stdlib.h>
#include <string.h>

/* USER CODE END Includes */
2. In the main function
int main(void)
{
  /* USER CODE BEGIN 1 */
  /* USER CODE END 1 */

  /* MCU Configuration--------------------------------------------------------*/
  /* Reset of all peripherals, Initializes the Flash interface and the Systick. */
  HAL_Init();

  /* USER CODE BEGIN Init */
  /* USER CODE END Init */

  /* Configure the system clock */
  SystemClock_Config();

  /* USER CODE BEGIN SysInit */
  /* USER CODE END SysInit */

  /* Initialize all configured peripherals */
  MX_GPIO_Init();
  MX_USART2_UART_Init();

  /* USER CODE BEGIN 2 */
  uint8_t counter = 0;
  /* USER CODE END 2 */

  /* Infinite loop */
  /* USER CODE BEGIN WHILE */
  while (1)
  {
    char buffer[64];
    snprintf(buffer, sizeof(buffer), "Hello World! %d\r\n", counter);
    HAL_UART_Transmit(&huart2, (uint8_t*)buffer, strlen(buffer), HAL_MAX_DELAY);

    HAL_GPIO_TogglePin(LD2_GPIO_Port, LD2_Pin);
    HAL_Delay(100);
    HAL_GPIO_TogglePin(LD2_GPIO_Port, LD2_Pin);
    HAL_Delay(200);

    HAL_GPIO_TogglePin(LD2_GPIO_Port, LD2_Pin);
    HAL_Delay(100);
    HAL_GPIO_TogglePin(LD2_GPIO_Port, LD2_Pin);
    HAL_Delay(1000);

    counter++;
    /* USER CODE END WHILE */

    /* USER CODE BEGIN 3 */
  }
  /* USER CODE END 3 */
}
Flashing and Debugging
Compile and flash your STM32 by starting the debugger in VSCode:
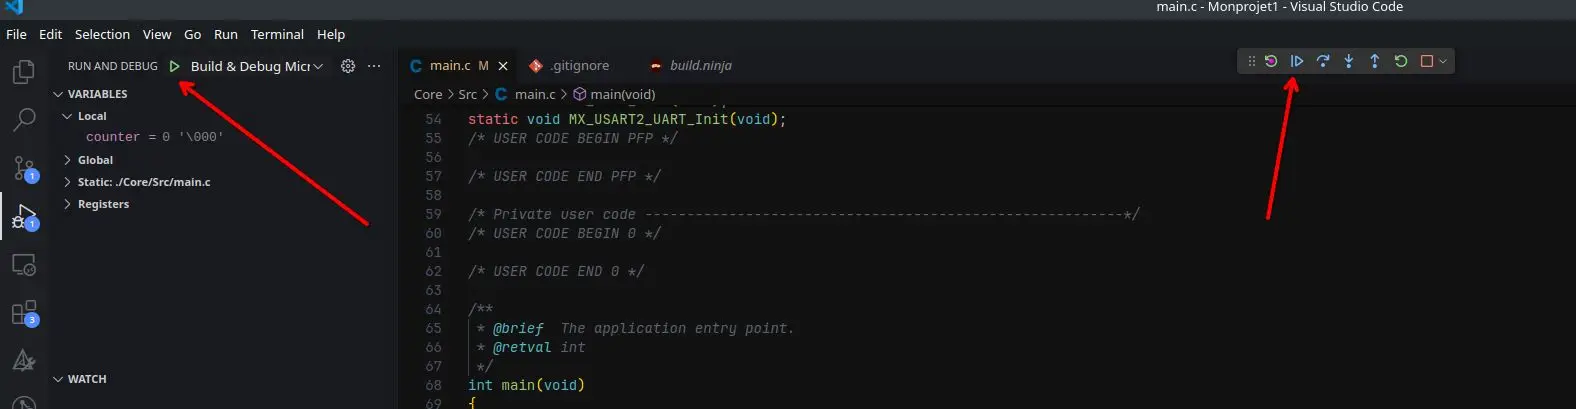 Starting the Debugger
 Viewing the UART Output
- Install the
screenutility (orminicom, etc.). - Identify the port under
/dev/(oftenttyACM0). - Run:
screen /dev/ttyACM0 115200
You should see your messages appear:
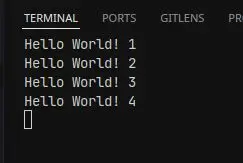 UART Output in Terminal
 And that’s it! You have successfully set up your STM32 programming environment on Fedora 41 with VSCode.